Wing Gundam, like so many other Americans, was the first Gundam that was introduced to me. It is only natural that I begin my collection with the Wing EW kits. My first one was MG Wing Zero pearl gloss. The one I am reviewing today of course will be the MG Deathscythe Hell EW Gundam.

(Trying out photoshop to give it some light effects)
The box art alone of this kit is enough to tell you that what's inside is definitely promising. The box is large compared to most MG kits due to the way they chose to place the parts together. In total there are about 16 runners I believe. It also comes packed with a dry transfer decal sheet as well as your regular stickers.
My attempt to take a nice picture.
This kit took me nearly 11 hrs to build. I just did the regular panel lining, going over nub marks with markers, applying decals, and top coating. It turned out rather nicely, especially being my 2nd Gundam kit ever. Definitely turned out a ton nicer than my MG Wing Zero Pearl gloss (I do have plans to get the regular Wing Zero).
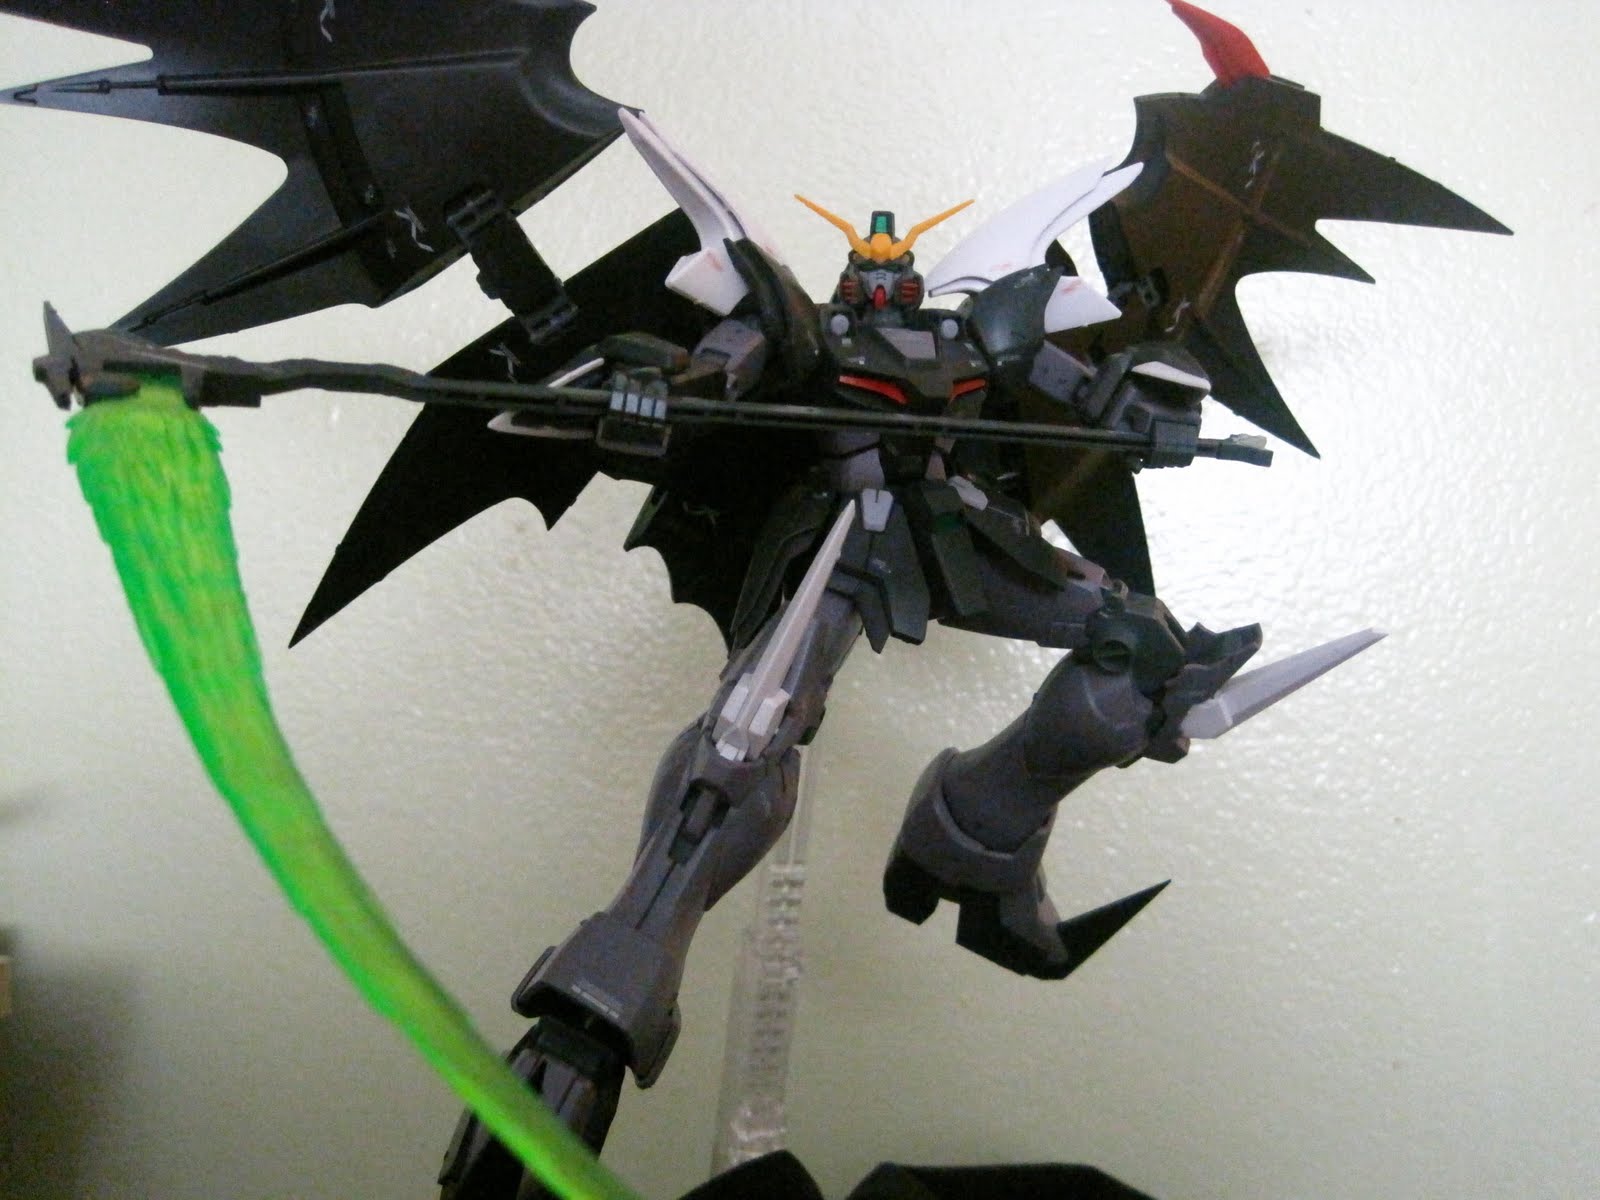
The kit comes with the parts to create the Gundam of course, as well as two figures of Duo Maxwell (the pilot, aka. "The God of Death") in the pilot uniform sitting and standing with civilian clothing.You will also get the "Beam Scissors", which is more like a "Beam Scythe". On top of that, you get an awesome effect part for the scythe blade, very detailed.
So far, I really think the purplish gray works out well for the kit. For some reason, I feel like the colors were made to go hand-in-hand. The decals just make the kit more detailed (something wing kits aren't known for). Out of the box, the wings will just look like a big slab of plastic. This means that there will be plastic ripple marks showing, but nothing top coat can't fix.

(My other attempt at a professional picture)
This kit is well articulated. You will get the usual 135 degrees of bending with the elbow joints, some wrist articulation, head can rotate a full 360, chest can move front and back, cockpit opens down, waist can't rotate too well (maybe the topcoat), double-jointed knees, front foot part moves up and down, spikes on shoulders can slide out, wings made up of segments with two points of articulation on each side.
I really do love the backpack unit. Beside's the easily solvable plasticness of it (to be expected from a large chunk of plastic), the kit is nicely engineered. From the main segment, there are two slide mechanisms that allow the wings to extend out. Following that is another segment that extends the upper segment of the wings and allows them to bend forwards and back. Great for some eye-catching poses, but never stopped me from going with the regular box art pose. Ever since I saw the box art, I knew this was the pose for me.

Aerial view

Another one with the back background (actually the cover for my Alienware laptop if you didn't notice the sign on the first one)
What's not to like about this kit? Well.. surprisingly there are some stuff. First off, if you look closely at the face, there is a little mark under the first mouth vent. This makes it a bit troublesome to panel line the mouth vents because the paint will tend to run down that mark (at least with other people, didn't find it troublesome, but looks ugly).
Secondly, the nub marks aren't well hidden. There's two clearly visible ones on the biceps which really bug the hell out of me when I look closely at it.
Third would have to be that you have to use some paint on the red grills on the face so it wont look like a big red piece stuck to the black head.
Fourth, I can't do the cloak mode. Why? Well after following their instructions over and over on how to do it, the red male and female parts that were supposed to attach the wings together just kept rubbing each other without the wings binding until eventually they just became too... well they're too loose now.
Finally, with the way their engineering is becoming better and better, kits tend to become more detailed and articulated. This means more parts. More parts equals the inevitable falling of pieces, little pieces, such as the little gray squares on the front and back skirts. I've nearly lost them in two separate occasions.

Shot of the awesome bat wings.
Final Thoughts:
It's a must have kit, especially if you loved Wing Gundam and Endless Waltz. There are some problems, but in the end, it's a great looking kit. Definitely unique looking compared to other kits. I enjoyed the inner-frame and even hope to build another kit with the same frame (all Endless Waltz kits will be using the same xxxg frame). There were some plastic marks on the wings, but nothing Top coat couldn't fix. The decals made it look so much more detailed. The Gundam is menacing and clearly deserves a spot in every collection. If you're a fan of box arts, this one will surely amaze you.
Two thumbs up!!!
how to topcoat?
ReplyDeleteshould i disaasemble it?
It's recommended you take it apart and topcoat to get in between the grooves and what not. Plus, you don't want topcoat on the joints; that restricts mobility.
DeleteCool and that i have a super offer: contemporary kitchen remodel
ReplyDelete